I will admit to scanning websites and books for recipes, any recipe, that reminds me of home. As funny as it sounds to say that Lemon Coolers are "homey" to me, they are. I guess most people think more of chocolate chip cookies, and although they are a favorite of mine too, for today, these lemony treats are sounding pretty tasty. They remind me of hot days by the beach, long car rides to get to favorite hiking spots, and powdered sugar all over my blouse ... and lips ... and chin ... Okay, Okay, I was a bit of a messy eater when I was younger. This recipe comes from "The Baking Sheet" back in a 2000 issue.
Even if it is only 40 degrees outside (or 4.4 C, depending on where you come from) these Lemon Coolers are tasty and as refreshing as a glass of lemonade. A little explosion of lemony sunshine on the tongue.
Enjoy them while decorating for the holidays!
Lemon Coolers
Ingredients:
- 1 cup softened butter
- 4 ounces softened cream cheese
- 1/4 teaspoon salt
- 1/2 teaspoon baking powder
- 1 teaspoon grated lemon peel
- 1/4 teaspoon lemon oil
- 1/2 cup sugar
- 1/2 cup powdered (confectioners) sugar
- 2 cups unbleached all-purpose flour
- Variation: Add 1 teaspoon raspberry flavoring to the cookie dough for Raspberry-Lemon Coolers.
Coating:
- 1 cup powdered sugar
- 3/4 cup fine sugar
- 1/4 teaspoon lemon oil
Directions:
- Oven Temperature: 375 degrees
- Cooking Time: 10-12 minutes
- Serves: 4 dozen
Getting Started
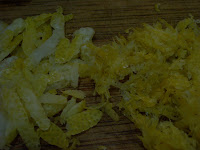
Before I get mixing, I wanted to show you the difference of grated lemon peel.
The peels on the left are from the same lemon, just different graters. See the difference in texture? As much as I love lemons, I'm just thinking I really don't want to be chomping down on the large peels in my cookies. I'm kind of sure you don't either. The picture on the right shows the graters I used. The large peels came from a regular grater, which, I am sure if I only had a large grater in my kitchen, I might get away with chopping and chopping those large peels down even more. Believe me, I've done that before when I've had just basics in my kitchen. I'm sure you've been there. One sharp knife. One measuring cup. One pan. One grater. Sometimes that's the only thing a budget allows for ... But an easier way is with a zester. That's the long handled grater on the right hand picture. You choose. I'm just suggesting ...
Dough:
Gather your ingredients. Okay. So I look really organized here, but in reality, I usually have open boxes and jars all over my counter. I'm just trying to impress you with my neatness today.
In a medium size bowl, beat together the butter, cream cheese, salt, baking powder, lemon peel and lemon oil.
When the mixture is soft and thoroughly blended, add the sugars, a little bit at a time until evenly blended and fluffy. Have you realized there are no raw eggs in this dough? Perfect for a little sample of raw dough. :)
Mix in the flour. Cover the bowl and refrigerate the mixture for 30 minutes.
I took a break here. See how easy it really all is. And you wanted to buy the commercially boxed ready to go stuff! After I put the dough in the fridge, I fed the dogs (yes, I make their own dog food, the spoiled canines that they are ...), ate dinner myself - Serbian Dish, a wonderful light combination of eggs, cheese and other things baked - and then uploaded what photos I had. I put my timer on so I'd know when a half hour was up, and I think I just heard it go off ...
Shaping:
Scoop out about 1 tablespoon of dough for each cookie, then roll the dough by hand into 1/2-inch balls.
Yep, a small cookie scoop heaped full equals about a tablespoon of cookie dough.
Place the balls on an ungreased or parchment-lined cookie sheet...
... and flatten them to about 1/4 inch thick and 1 3/4 to 2 inches in diameter.
Baking:
Bake the cookies in a 350 degree preheated oven or until they're lightly browned on the bottom and the edges. The recipe says 10-12 minutes, but my oven took 16 minutes. At first I checked every minute, then I got exasperated and set the timer for 2 minutes at a time. My advice, as with any baked goods, just keep checking up on them after the original time until they're done. Look for them to be very light brown on the edges.
Finishing:
While the cookies are baking, make the coating. Place the sugars in a food processor or blender (or you can use a fork or a whisk), and add the lemon oil. Process until well-blended. Note: If you're using a fork or whisk, it may take a little bit of work to get the oil all evenly blended. Sometimes we just don't have "fine" sugar in our cupboards. So here's the next best thing - take your "regular" sugar and place it in the food processor first. Pulse it a few times until the sugar has been broken down a little. Then add all other ingredients. The attempt is to make the coating as fine as possible without using all powdered sugar.
Time for another break as I turn some music on, and suddenly I am dancing in the kitchen to Reba's (McIntyre) "Turn On The Radio". I have to say, that spatula in my hand feels more like a microphone to sing into ...
Allow the cookies to cool on the sheets for about 5 minutes, then dip them into the prepared sugar coating mixture. Place the cookies on a wire rack and let them cool completely.
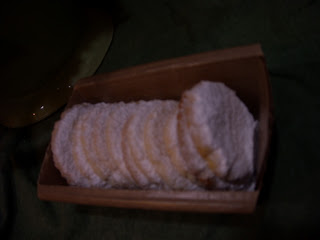
After they're completely cooled, shake more powdered sugar over them.
Sorry folks, still getting used to my camera. That picture was kind of dark.
Eat. Enjoy. Let that lemony goodness bring sunshine to your mouth.
Cleaned up my mess in the kitchen.
Ate a few cookies. Yum. Light. Sugary. And Lemony.
Now I can relax before it's bedtime.
Good night y'all!


No comments:
Post a Comment